
You are standing in your garage on a Saturday morning. The driver-side power window refuses to move. The dome light flickers for no reason. Something in the electrical system has gone wrong, and you have no idea where to start looking. Sound familiar? This is the exact moment when a 12 volt test light earns its keep.
This humble tool costs less than a decent lunch, fits in your back pocket, and can pinpoint electrical problems in seconds. Professional mechanics have relied on it for decades, and weekend DIYers swear by it for good reason. It strips away the guesswork and gives you a clear, visual answer to the most basic question in electrical troubleshooting — is there power here, or not?
In this guide, you will learn everything worth knowing about this essential diagnostic tool. We will cover how it works, when to use it over a multimeter, how to pick between incandescent and LED versions, and how to avoid the mistakes that lead to blown fuses and wrong diagnoses. Whether you are shopping for your first tester at a local hardware store or eyeing a professional-grade Snap-On unit from the tool truck, this article will help you make a smart, informed decision.
What Is a 12 Volt Test Light and How Does It Work?
A 12 volt test light is one of the simplest electrical diagnostic tools ever made. It has three parts — a sharp metal probe at one end, an indicator light in the handle, and an insulated wire with an alligator clip at the other end. That is the entire tool. No batteries, no digital screens, no complicated settings to scroll through.
The way it works is straightforward. You clip the alligator lead to a known ground source, usually the negative terminal of the vehicle battery or a clean, bare-metal point on the chassis. Then you touch the sharp probe to whatever wire, fuse, or connector you want to test. If the circuit is live, current flows from the test point, through the indicator bulb, down the ground wire, and back to the battery. The bulb lights up, and you instantly know power is present at that point in the circuit. If the bulb stays dark, there is no power reaching that spot, which tells you the problem is somewhere upstream.
This simplicity is the tool’s greatest strength. You do not need to interpret numbers on a screen or select the right measurement mode. You just look at the bulb — bright means good, dark means bad.
When should you reach for this tool instead of a multimeter? The answer depends on what you are trying to find out. A multimeter measures exact voltage, resistance, and amperage. It gives you precise data. A test light, on the other hand, answers a single yes-or-no question about the presence of power. For quick checks like verifying fuses, tracing a dead circuit, or confirming that a switch is passing current, the test light is faster and easier to use. For measuring exact battery voltage, checking sensor resistance, or diagnosing charging system output, you need a multimeter. The smartest approach is to own both and use each one where it performs best.
One thing that many people overlook is the loading advantage. An incandescent test light draws roughly 250 milliamps of current to illuminate its bulb. That small load can expose weak connections that a high-impedance digital multimeter would never catch. A corroded wire with only two strands left might show a full 12 volts on a meter, but the test light will barely glow because the circuit cannot deliver enough current through the damaged wire. This makes the test light genuinely superior for catching certain types of faults.
Incandescent vs. LED: Choosing the Right 12 Volt Test Light
Not all testers are created equal, and the biggest choice you will face is between an incandescent model and a 12 volt LED test light. Both do the same basic job, but they behave very differently under the hood.
Incandescent models use a small filament bulb, similar to a miniature headlight. This bulb draws measurable current from the circuit, which is both an advantage and a limitation. The advantage, as mentioned above, is that the current draw acts like a mini load test. If a wire or connector has high resistance from corrosion, the bulb will dim noticeably or not light at all, tipping you off to the real problem. The limitation is that this current draw can potentially interfere with very low-current electronic circuits. In practice, most automotive power circuits handle the 250 milliamp draw without any issue, but you should exercise caution around computer-controlled modules. Another practical benefit of incandescent testers is that the bulb brightness gives you a rough sense of voltage — a bright glow means solid voltage, a faint glow means something is eating into the power supply along the way.
LED models take the opposite approach. They draw extremely little current, sometimes under 20 milliamps, which makes them safe for probing sensitive electronic circuits like ECU signal wires, airbag modules, and CAN bus communication lines. Many modern LED testers also include dual-color indicators — red for positive voltage, green for ground — and some even display a numerical voltage reading on a small built-in screen. These extra features can save you from grabbing a separate multimeter for a quick voltage check.
The tradeoff is accuracy in detecting weak circuits. Because an LED needs so little power to light up, it will glow brightly even on a circuit that is badly corroded and unable to deliver usable current to the actual component. In that scenario, the LED gives you a green light while the component stays dead, leading you down the wrong diagnostic path. Experienced technicians often keep both types in their toolbox and choose based on the circuit they are testing. For fuses, relays, power feeds, and trailer wiring, the incandescent version is hard to beat. For sensor wiring, module connectors, and anything involving a vehicle’s onboard computer, the LED version is the safer pick.
Here is a quick way to think about it. If the circuit runs a motor, a light, or a solenoid, grab the incandescent tester. If the circuit runs a sensor, a processor, or a communication line, grab the LED.
How to Use a 12 Volt Test Light Step by Step
Using this tool correctly is not complicated, but skipping steps leads to bad readings and wasted time. Here is the proper sequence for the most common diagnostic tasks.
Verify that the tool itself is working. Before you test anything on the vehicle, make sure your tester is functional. Clip the alligator lead to the negative battery terminal and touch the probe to the positive terminal. The bulb should light up immediately. If it does not, the bulb may be burned out, the clip may have a poor connection, or the internal wire may be broken. Never trust a tester you have not verified first.
Test fuses at the fuse box. This is the single most common use for the tool. With the alligator clip still connected to a solid ground, touch the probe to the small exposed metal tabs on top of each fuse. Test both sides. If both sides light up, the fuse is good and the circuit has power. If only one side lights up, the fuse is blown and needs to be replaced. This technique lets you check every fuse in the panel in under a minute without pulling a single one out.
Trace power through a circuit. Once you have confirmed that the fuse is good, move downstream. Check for power at the switch, then at the wiring connector, then at the component itself. Wherever the light stops glowing, you have found the break. Maybe it is a corroded connector behind the dashboard. Maybe it is a pinched wire under the carpet. The tester leads you directly to the failure point without any guesswork.
Test for a good ground. Electrical problems are not always about missing power. A bad ground is just as common and just as crippling to a circuit. To check a ground path, reverse the setup. Clip the alligator lead to the positive battery terminal instead of the negative. Now touch the probe to the ground wire or ground bolt you want to verify. If the bulb lights up, the ground path is solid. If it stays dark, you have found your problem — a rusty ground bolt, a broken ground strap, or a wire that has come loose from its mounting point.
Check for parasitic battery drain. If your battery keeps dying overnight, something in the vehicle is drawing current when everything should be off. Disconnect the negative battery cable. Connect the test light between the disconnected cable end and the negative battery post, placing it in series with the circuit. If the bulb glows, there is a current draw happening somewhere. Now start pulling fuses one at a time. When the bulb goes dark after pulling a specific fuse, you have identified the circuit that is draining your battery. From there, you can investigate the individual components on that circuit to find the culprit — usually a stuck relay, a faulty door switch, or an aftermarket accessory that was wired incorrectly.
Top 12 Volt Test Lights Worth Considering in 2026
The market is flooded with options at every price point, so knowing what to look for saves you from buying a tool that falls apart after three uses.
Budget-friendly picks at major retailers. If you search for a 12 volt test light at Walmart, you will find a handful of basic incandescent and LED models in the five to twelve dollar range from brands like Lisle, Innova, and Performance Tool. These are perfectly adequate for occasional home use — checking fuses, testing trailer lights, verifying that a new light switch is getting power. The same applies if you browse the electrical testing aisle at Lowes, where similar options sit alongside more expensive digital multimeters. When shopping at this price point, pay close attention to the alligator clip. Cheap clips with weak springs lose grip on the battery terminal mid-test, which is endlessly frustrating. Squeeze the clip before you buy. If it feels flimsy, move on.
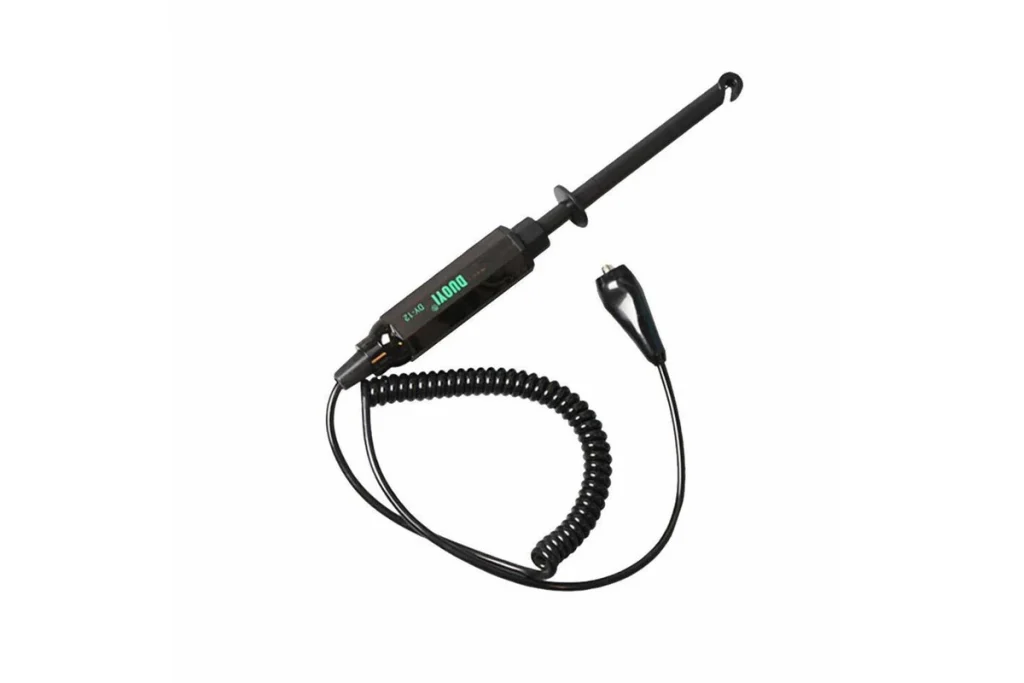
The Snap-On option for professionals. At the other end of the spectrum sits the Snap-On 12 volt test light lineup, which includes the EECT300 series with a classic incandescent bulb and the EECT400 and EECT413 with digital voltage displays, coiled cords, and interchangeable probe tips. These testers are built for technicians who use them dozens of times a day, five days a week, in environments where tools get dropped on concrete floors and dragged through engine bays. The Snap-On EECT413, for example, offers computer-safe draw, surge-protected circuitry, a voltage readout accurate to within 0.3 volts, and a kit of non-intrusive grabbers and clips that allow hands-free operation while you jiggle a wiring harness to find an intermittent connection. Is the premium price justified? For full-time professionals, absolutely. For weekend DIYers who test a circuit once a month, a mid-range option from OTC or Lisle delivers most of the same functionality at a fraction of the cost.
Features that actually matter when comparing 12 volt test lights. Regardless of brand or budget, focus on these four things. First, probe sharpness. A sharp, tapered point lets you pierce wire insulation cleanly for back-probing without causing significant damage. Dull probes force you to push harder, which can nick or break the conductor inside. Second, lead length. A short lead works fine under the dashboard, but if you are testing trailer wiring or working on a full-size truck, you need at least four to six feet of reach. Third, clip strength. The alligator clip needs a firm bite and good insulation to prevent accidental shorts against nearby metal. Fourth, voltage range. Some testers handle six to twenty-four volts, which means a single tool covers vintage six-volt cars, standard twelve-volt systems, and heavy-duty twenty-four-volt diesel trucks. That kind of flexibility is worth paying a few extra dollars for.
Common Mistakes to Avoid With Your Test Light
Even a simple tool can lead you astray if you use it carelessly. Here are the errors that trip up beginners and experienced mechanics alike.
Probing sensitive electronic circuits with an incandescent tester. Modern vehicles are packed with computer-controlled modules, and many of the signal wires running between sensors and ECUs carry extremely low current. Pushing a standard incandescent probe onto one of these wires can draw enough current to damage the module or corrupt a signal. Fuel injection systems, airbag controllers, and body control modules are especially vulnerable. When working around these systems, switch to a low-current LED tester or a digital multimeter with high input impedance.
Grounding to a painted or rusty surface. Your test light is only as good as its ground connection. If you clip onto a bolt covered in paint, undercoating, or surface rust, the poor contact will give you a dim or absent reading and you will start chasing a problem that does not exist. Always clip to a clean, bare-metal surface. The negative battery terminal is the most reliable ground point on any vehicle. If that is too far away, scrape a small area of paint off a chassis bolt or engine bracket and clip there.
Ignoring a dim bulb. A test light that glows faintly is not telling you the circuit is “mostly good.” It is telling you there is high resistance somewhere in the path — a corroded connector, a loose terminal, or a wire that is damaged internally. A dim reading demands further investigation, not a shrug. This is one area where the incandescent tester shines, because the brightness of the filament is directly proportional to the current flowing through it. A dim glow is a warning you should never ignore.
Using a twelve-volt tester on household voltage. This sounds obvious, but it happens more often than you might think. A tool rated for automotive twelve-volt circuits will immediately blow its bulb if connected to a 110-volt or 220-volt household outlet, and the resulting short could create a genuine safety hazard. Automotive testers and mains-voltage testers are completely different tools designed for completely different environments. Never mix them up.
Practical Applications Beyond the Car
While most people associate this tool with automotive work, it is equally useful anywhere a twelve-volt DC system exists.
RVs, boats, and off-grid solar setups. Motorhomes, camper trailers, and sailboats all run house batteries and accessory circuits at twelve volts. When the water pump stops working, the interior lights flicker, or the inverter throws an error code, a test light is the fastest way to confirm whether the problem is electrical or mechanical. Solar charge controllers, fuse panels, and battery disconnect switches can all be checked the same way you would test a circuit in your car.
Trailer wiring and tow vehicle connections. Anyone who has towed a trailer knows the agony of plugging in the connector and finding that the left turn signal does not work. With a test light, you can check each pin of a four-pin flat connector or a seven-pin round plug to see exactly which wire is getting power and which is dead. Ground the tester, have someone press the brake pedal or activate the turn signal, and probe each pin individually. It takes thirty seconds and tells you immediately whether the problem is in the tow vehicle, the connector, or the trailer itself.
Motorcycles and ATVs. Smaller twelve-volt systems are just as prone to electrical gremlins as full-size cars. A dead horn, a non-functioning tail light, or a starter relay that clicks but does not crank can all be diagnosed with the same basic technique — ground the clip, probe the circuit, and follow the power until it disappears.
Conclusion
A 12 volt test light is one of those rare tools that delivers far more value than its price tag suggests. For under twenty dollars, you get a diagnostic instrument that can trace dead circuits, identify blown fuses, verify ground connections, and hunt down parasitic battery drains — all without needing an engineering degree to operate it.
The key is matching the right version to the job. Incandescent testers excel at load-testing power circuits and catching corroded connections that a meter would miss. LED testers are the safer choice for sensitive electronics and computer-controlled modules. Professional-grade options from brands like Snap-On offer durability and extra features for technicians who rely on the tool every single day, while budget models from retail stores handle occasional home use just fine.
Pair your tester with a decent multimeter, and you have a combination that will solve the vast majority of electrical problems on any twelve-volt system — cars, trucks, boats, RVs, motorcycles, and everything in between. Most electrical failures come down to two things: missing power or a bad ground. A good test light reveals both in seconds, and that alone makes it one of the smartest purchases you will ever make for your toolbox.
Frequently Asked Questions
1. What is a 12 volt test light used for? A 12 volt test light is used to check whether electrical power or ground is present at a specific point in an automotive circuit. It is commonly used for testing fuses, tracing dead wires, verifying switch operation, and diagnosing ground faults in cars, trucks, boats, and RVs.
2. How do you use a 12 volt test light to check fuses without removing them? Clip the alligator lead to a solid ground, then touch the probe to each of the two small exposed metal tabs on top of the fuse. If both sides light up, the fuse is good. If only one side lights up, the fuse is blown and needs to be replaced.
3. Can a 12 volt test light damage my car’s computer or ECU? A standard incandescent test light draws around 250 milliamps, which is safe for most power circuits but can potentially damage sensitive computer-controlled modules, airbag systems, and CAN bus communication lines. For those circuits, use a low-current LED tester or a digital multimeter instead.
4. What is the difference between an incandescent and an LED test light? An incandescent test light uses a filament bulb that draws noticeable current, making it useful for detecting weak connections under load. An LED test light draws very little current, which makes it safer for sensitive electronics but less effective at revealing corroded or high-resistance circuits.
5. Is a test light better than a multimeter for automotive work? Neither tool is universally better. A test light is faster for quick power and ground checks and can reveal weak circuits under load. A multimeter provides precise voltage, resistance, and amperage readings. Most professionals keep both in their toolbox and choose based on the specific diagnostic task.
6. What does it mean when a 12 volt test light glows dimly? A dim glow typically indicates high resistance somewhere in the circuit, such as a corroded connector, a loose terminal, or a wire that is damaged internally. It can also mean the test light’s own ground connection is poor. A dim reading should always be investigated further rather than ignored.
7. Can I use a 12 volt test light to find a parasitic battery drain? Yes. Disconnect the negative battery cable and connect the test light in series between the cable and the negative battery post. If the bulb glows, something is drawing current with the vehicle off. Pull fuses one at a time until the light goes out to identify the offending circuit.
8. What is a computer-safe test light? A computer-safe test light is a low-current tester, usually LED-based, that draws less than 25 milliamps. This minimal draw prevents damage to sensitive vehicle electronics like engine control modules, body control modules, and airbag circuits that cannot handle the higher current of a standard incandescent tester.
9. How do I test a ground wire with a 12 volt test light? Reverse the normal setup by clipping the alligator lead to the positive battery terminal. Then touch the probe to the ground wire or ground point you want to test. If the bulb lights up brightly, the ground path is solid. If it stays dark or glows dimly, you have a faulty ground connection.
10. Can I use a 12 volt test light on a 24-volt truck or a 6-volt classic car? Some test lights are rated for a range of voltages, typically six to twenty-four volts. Always check the specifications printed on your particular tool before using it outside a standard twelve-volt system, as exceeding the voltage rating will burn out the bulb or damage the internal components.
11. How do I test trailer lights with a 12 volt test light? Ground the tester to a clean metal surface on the tow vehicle, then probe each pin of the trailer plug while an assistant activates the running lights, brake pedal, and turn signals one at a time. If the tester lights up at a pin, that circuit is delivering power. A dark reading at any pin tells you which function is not getting power.
12. Can a test light check if a relay is working? Yes. Remove the relay and supply twelve volts to the coil terminals — you should hear a click. Then connect the test light between the switch terminals. If the light comes on when the relay is energized and goes off when power is removed, the relay is functioning properly.
13. Why does my test light not work even though the battery is charged? The most common causes are a burned-out bulb inside the tester, a broken internal wire, or a poor ground connection at the alligator clip. Always verify the tool first by clipping to the negative battery terminal and touching the probe to the positive terminal before testing any circuit.
14. Is it safe to pierce wire insulation with a test light probe? Many technicians back-probe wires by piercing the insulation with the sharp tip. While it works, it can allow moisture into the wire and cause corrosion over time. If you do pierce insulation, seal the hole with a small dab of silicone or electrical tape after testing. Use non-piercing back-probe pins when possible.
15. Can I use a 12 volt test light on household 110V or 220V wiring? No. A twelve-volt automotive test light is designed exclusively for low-voltage DC circuits. Connecting it to household AC power will instantly destroy the bulb and can create a dangerous short circuit or shock hazard. Always use a mains-rated voltage tester for household electrical work.
16. What should I look for when buying a 12 volt test light? Focus on four things — a sharp probe tip for clean back-probing, a strong alligator clip that grips firmly, a flexible lead wire at least four feet long, and a voltage range that covers the systems you work on. A comfortable grip and a bright indicator bulb or LED also make a real difference during long diagnostic sessions.
17. How much current does a standard 12 volt test light draw? A typical incandescent automotive test light draws between 200 and 250 milliamps. Some heavier-duty models with larger bulbs can draw up to one amp or more. LED testers draw far less, usually under 25 milliamps. Knowing your tester’s draw helps you decide which circuits it can safely test.
18. Can a 12 volt test light be used on motorcycle or ATV electrical systems? Yes. Most motorcycles and ATVs run on twelve-volt electrical systems identical in principle to cars and trucks. A test light works the same way — ground the clip, probe the circuit, and follow the power. It is especially handy for chasing dead headlights, non-working horns, and faulty charging connections.
19. What is the advantage of a test light over a Power Probe? A basic test light is simpler, cheaper, and carries almost zero risk of accidentally applying power to a circuit and damaging a module. A Power Probe can inject voltage and ground, which is useful but risky if applied to the wrong wire. Many experienced technicians use both but reach for the simple test light first for routine checks.
20. How do I use a test light to check a fuel pump circuit? Ground the test light, then probe the power wire at the fuel pump connector while an assistant turns the ignition key to the run position. The bulb should light up for a few seconds as the pump primes. If there is no light, check the fuel pump relay and fuse first, then trace the wiring back toward the fuse box.

